Classify Sauna LED Strip Problems as Electrical, Environmental, or Mechanical
Most failures fit into one or more of three groups
– Electrical: incorrect voltage, an undersized driver, voltage drop, loose terminals, wrong polarity, or controller problems.
– Environmental: excessive temperature, direct heater exposure, condensation, cleaning water, chemicals, or an unsuitable component rating.
– Mechanical: failed adhesive, tight bends, unsupported cable, damaged encapsulation, movement at a joint, or a strip trapped by expanding timber.
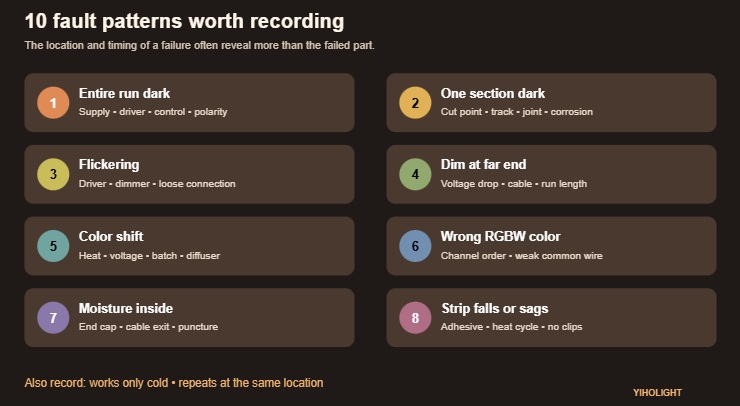
Do not begin by cutting out the dark section. Photograph the installation, record when the fault occurs, and note whether the whole circuit or only part of it is affected. If possible, record the temperature at the strip, driver, and connection locations during normal operation.
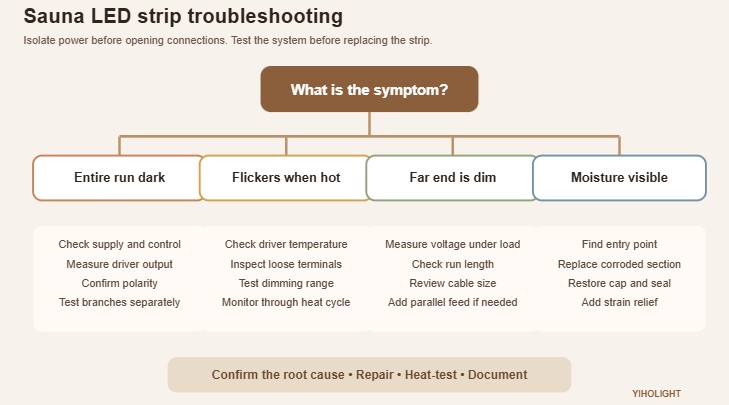
Safety note: isolate the electrical supply before opening connections. Mains-side testing and permanent electrical work should be completed by a qualified professional in accordance with local requirements.
The Entire Sauna LED Strip Is Dark
If the complete run is off, the strip itself may still be functional. Begin outside the sauna chamber.
Check whether the circuit protection has operated, the control system is calling for light, and the LED driver is receiving its correct input. Then verify the driver’s DC output and polarity with suitable test equipment. Inspect accessible fuses, terminals, and controller outputs.
A driver that works when cold but shuts down after the sauna heats may be entering thermal protection. Installing an ordinary power supply inside a hot or poorly ventilated enclosure is a common cause. Place drivers and controllers outside the heated chamber in a dry, ventilated, serviceable location unless the equipment is explicitly rated for the actual conditions.
Only One Section Is Dark
A dark segment with the rest of the run operating usually points to a local open circuit, damaged copper track, failed solder joint, incorrect field connection, or moisture-related corrosion. Look for a fault near a cut point, connector, sharp bend, fastener, or cable transition.
Do not pierce the silicone encapsulation with test probes and then return the strip to service. That creates a new moisture path. If the failed section must be removed, cut only at the marked interval and reseal the new end using the compatible cap and sealant system.
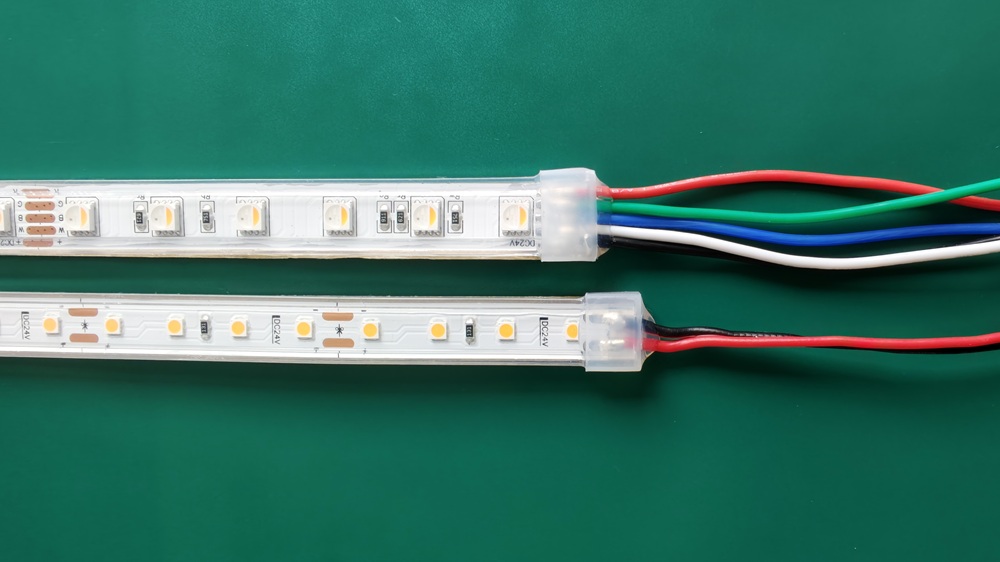
Yiholight’s listed white sauna strip configurations use a 50mm cut size, while the listed RGBW model uses a 100mm cut size. Project-specific, factory-prepared lengths can reduce the number of site-made seals.
The Strip Flickers
Sauna LED strip flickering can come from an overloaded or incompatible driver, a loose connection, a dimmer operating outside its load range, controller interference, or unstable supply voltage. Heat can make a marginal connection worse by changing contact pressure as materials expand.
Observe whether flicker affects every run connected to one driver. If it does, investigate the shared driver, controller, and supply. If only one run flickers, inspect that branch and its connections. Test at full brightness and through the dimming range; a system that appears stable at 100 percent may flicker at low output.
For RGBW, confirm that each channel is wired consistently and that the controller can handle the connected load. A single weak common conductor can affect several colors at once.
The Far End Looks Dimmer
Gradual brightness loss along the run is a classic sign of voltage drop rather than LED aging. It becomes more visible on longer, higher-power runs or with undersized supply cable.
Calculate the connected load from strip length multiplied by watts per meter. Check the manufacturer’s maximum run guidance and measure voltage at both the feed and far end under load. The solution may require a larger cable, a shorter run, power injection, or several parallel feeds from a properly sized distribution point.
Do not compensate by increasing the driver above the strip’s rated voltage. Overvoltage can damage LEDs and shorten life.
White Light Changes Color Along the Run
Color shift may accompany voltage drop, but it can also result from heat damage, material discoloration, mixed production batches, or contamination on the diffuser. Compare the strip when cold and at normal operating temperature. Check whether the change is gradual, localized near the heater, or limited to a replaced section.
For repeat hotel or sauna-manufacturer projects, record the LED specification, color temperature, color tolerance, production batch, and approved replacement part. A nominal “3000K” replacement from another source may still look different when mounted beside the original.
RGBW Colors Are Wrong
If red appears when green is selected, the channel order is incorrect. If mixed colors look uneven along the run, investigate voltage drop or a weak channel connection. If the white setting looks tinted, confirm that the programmed scene uses the dedicated white channel as intended rather than only mixing RGB.
Save controller settings and label channel order at the distribution point. After controller replacement, verify default behavior after power loss. For wellness spaces, a calm warm-white default is usually more practical than restarting in a dynamic color effect.
Moisture Appears Inside the Strip or End Cap
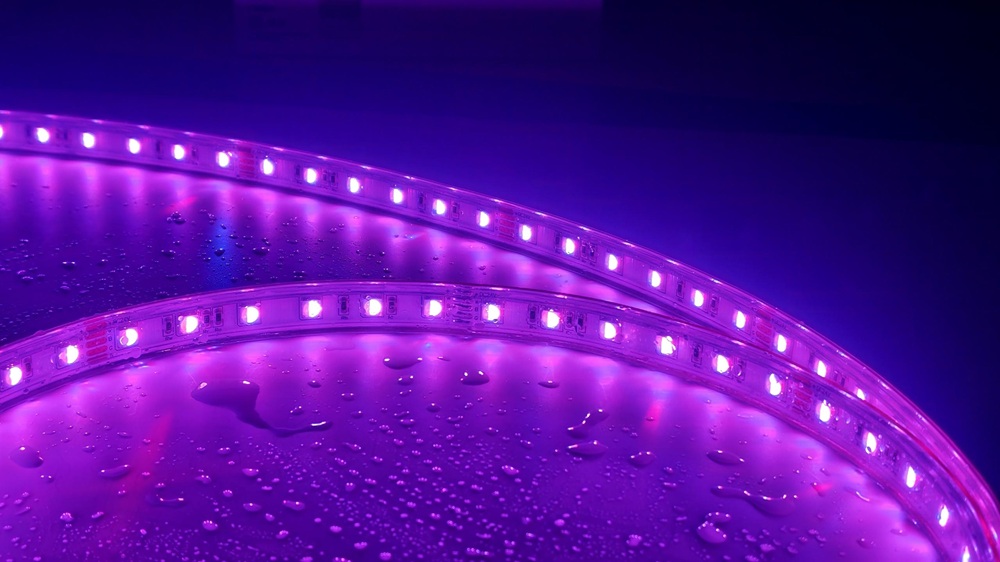
Visible droplets, dark copper, green corrosion, or intermittent faults after cooling indicate a sealing problem. Moisture often enters at a cut end, cable exit, connector, or accidental puncture rather than through the main body of a correctly encapsulated strip.
Once corrosion has started, drying the product may restore light temporarily but does not make the connection reliable. Replace the affected section, identify the entry point, and improve the termination detail. Provide strain relief, compatible sealant, full curing time, and a cable route that does not guide water toward the seal.
An IP rating applies to a properly finished assembly. Field cutting changes that assembly, so the installer becomes responsible for restoring the required protection.
The Strip Falls or Sags
Adhesive failure is especially common on warm timber, oily surfaces, curved details, or installations exposed to repeated heat cycles. Even strong adhesive can soften, while the substrate expands and contracts.
Heat-resistant sauna lighting should use compatible mechanical clips, channels, or retention features rather than relying on tape alone. Clips must not crush the strip, puncture encapsulation, or force a bend tighter than the permitted radius. Allow long runs to expand without concentrating stress at a termination.
If a fallen strip has touched a hot surface or been pulled by its cable, inspect it for hidden damage before remounting.
The Strip Works Cold but Fails When the Sauna Is Hot
Heat-dependent faults are valuable diagnostic clues. A driver may enter thermal protection, a weak solder joint may open as it expands, a controller may exceed its rated ambient temperature, or voltage drop may worsen as conductor resistance rises.
Test the system through a controlled heat cycle while monitoring accessible components. Never bypass thermal protection or relocate sensors simply to keep the lights on. Move unsuitable equipment outside the hot zone and specify every component for the measured location.
Yiholight’s sauna LED strips are designed for high-temperature and high-humidity applications, with published operation from -25°C to 100°C. That strip rating does not automatically apply to third-party connectors, profiles, cable, dimmers, or drivers.
Failures Keep Returning in the Same Location
A repeated local failure usually reveals a design condition, not bad luck. Common causes include direct radiant heat, a hidden fastener, water tracking along a cable, excessive bending, a sealed cavity that traps heat, or timber movement compressing the strip.
Map the failed locations on a drawing. Compare them with heater clearance, bench supports, joints, cleaning patterns, and airflow. Relocating a run by a small distance or redesigning the mounting detail may be more effective than installing a higher-rated replacement in the same problem spot.
A Safe Troubleshooting Sequence
Use a consistent process so evidence is not lost:
1. Ask when the fault started and whether it changes with heat, humidity, or dimming.
2. Photograph the lit and unlit installation before disassembly.
3. Isolate power and inspect accessible drivers, controls, terminals, seals, clips, and cables.
4. Confirm specified voltage, circuit load, polarity, and controller channel order.
5. Test the driver and branches methodically with appropriate equipment.
6. Identify the root cause before selecting replacement parts.
7. Repair seals and mechanical support to the required environmental rating.
8. Test cold, during normal heating, and after cooling.
9. Update drawings, labels, and maintenance records.
Preventing the Next Sauna LED Strip Failure
Prevention begins before installation. Match the complete lighting assembly to measured temperatures and moisture exposure. Keep drivers and controllers outside the chamber. Use 24V distribution designed for the real load, limit long runs, and protect every termination. Mechanically support the strip and preserve access to serviceable parts.
For commercial projects, order a spare from the same approved specification and batch when practical. Store it flat, dry, and labeled. A maintenance team should not have to guess between several similar-looking strips during an urgent repair.
Frequently Asked Questions
Why do my sauna lights stop working only after the room heats up?
A driver or controller may be overheating, or a heat-sensitive connection may open as materials expand. Monitor the system through a normal heat cycle and verify the rating and location of every component.
Can I repair a waterproof LED strip with ordinary tape?
Ordinary tape does not restore the strip’s environmental protection or heat rating. Use the compatible end cap, sealant, and termination method specified for the product.
Why is one end of my sauna LED strip darker?
The most likely cause is voltage drop. Check run length, load, cable size, feed arrangement, and voltage under load. Do not raise the supply above the strip’s rated voltage.
Should I replace the driver and strip together?
Only after diagnosis. If the driver caused the fault or its rating is unsuitable, reusing it can damage the new strip. If it tests correctly and is properly located and sized, replacement may not be necessary.
Diagnose the System, Then Choose the Replacement
The fastest repair is not the one that restores light for a day; it is the one that removes the cause. A documented history of **sauna LED strip problems** also helps manufacturers and facility teams improve future specifications. Yiholight offers 24V white and RGBW sauna LED strip options, custom lengths, connection solutions, and OEM/ODM support for high-temperature projects. Send the team your installation drawing, measured temperatures, photos, circuit details, and fault history for a more accurate replacement recommendation.
Learn more:
How to Test Sauna LED Strips Before a Bulk Order
How to Design Sauna LED Strip Lighting by Temperature Zone
Sauna LED Lighting Retrofit: How to Upgrade an Existing Sauna Safely
Sauna & Steam Room LED Strip Lighting: Special Requirements You Must Know
As a bespoke lighting solution provider, Yiholight specializes in high-quality LED strips and neon flex. Our products are engineered for durability, brightness, and ease of installation—trusted by B2B customers across the globe.
Contact us today to explore the best LED lighting for your business!
© [Yiholight] and [www.yiholight.com]. Unauthorized use or duplication of this material is strictly prohibited without express written permission from the site’s author or owner. Excerpts and links may be used, provided full, clear credit is given to [Yiholight] and [www.yiholight.com], with appropriate, specific direction to the original content.