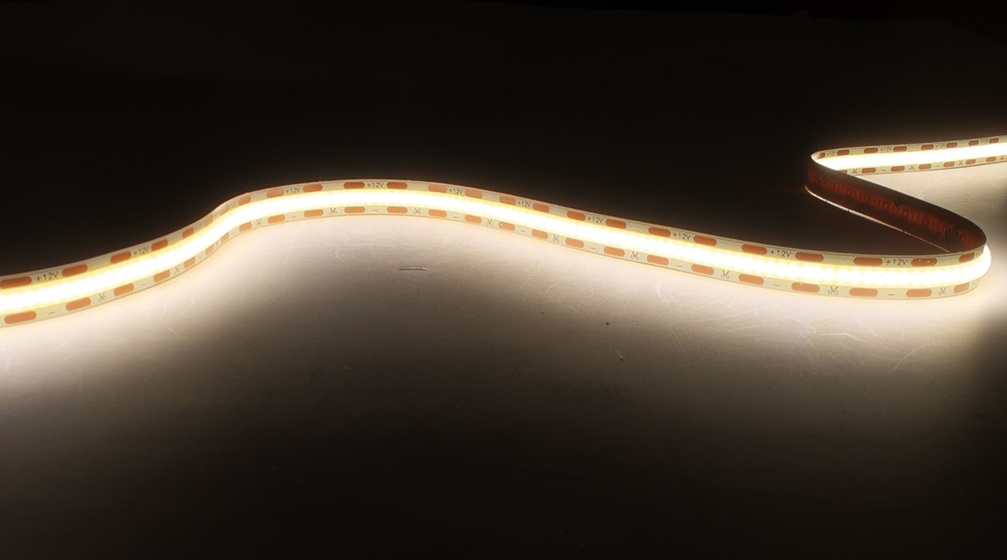
COB LED strips create a smooth, dot-free line of light, but every installation still depends on reliable electrical connections. On site, soldering is not always practical: installers may be working inside cabinets, display cases, shelves or finished interiors where space, time and ventilation are limited. A COB LED strip solderless connector provides a fast alternative for joining a strip to a power cable or connecting two cut sections.
Compatibility is not universal. A connector can look correct and still fail because its PCB width, pin count, contact position, current rating or environmental protection does not match the strip. This guide explains how to select and install the right connector and avoid intermittent contact.
What Is a COB LED Strip Solderless Connector?
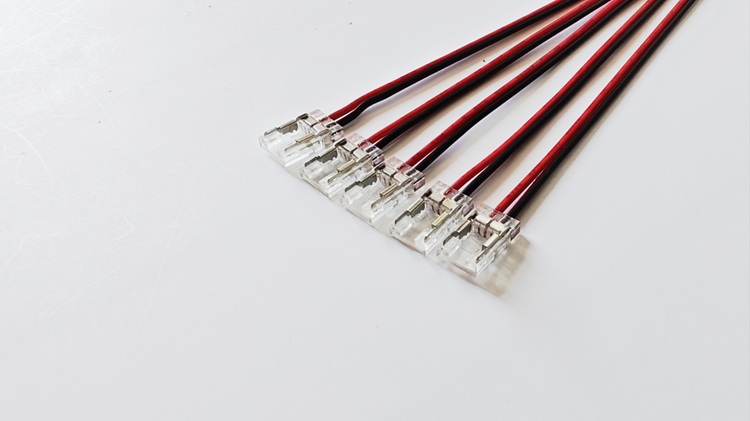
A solderless connector is a small mechanical termination that presses metal contacts against the copper pads on an LED strip. It completes the circuit without a soldering iron. Depending on the design, the other side of the connector may accept a second strip or a pair of wires.
The two most common formats are:
– Strip-to-wire connector: connects the cut end of a COB strip to a power supply lead, controller cable or extension wire.
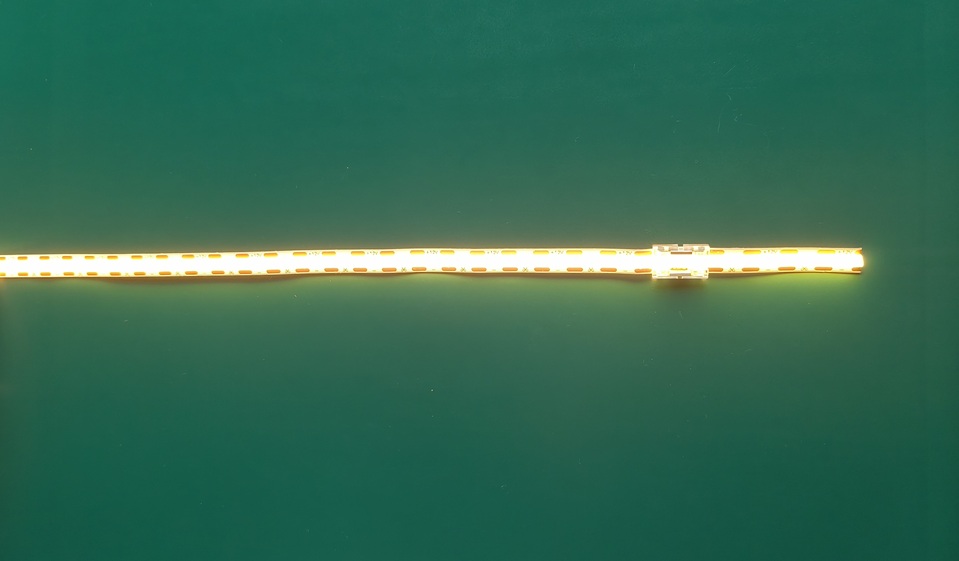
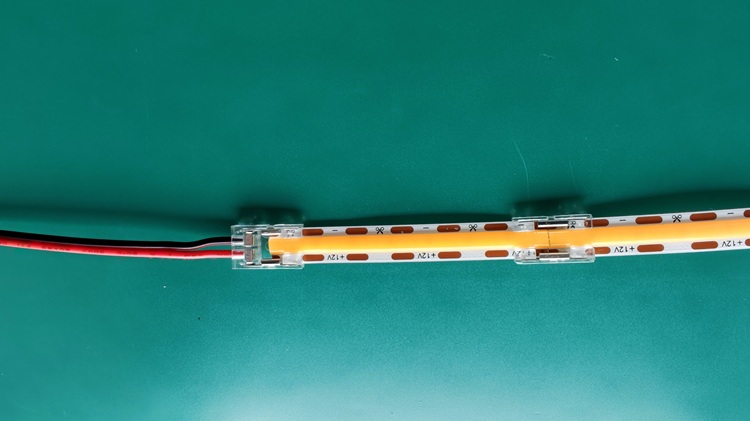
– Strip-to-strip connector: joins two pieces of COB tape in a straight line. A wired jumper version can bridge a corner or an obstacle while allowing the two strip sections to be positioned separately.
Why COB Strips Need the Correct Connector
COB tape has densely mounted chips under a continuous phosphor layer, but connection still occurs at exposed copper pads beside a marked cut point. Connector contacts must land fully on those pads without touching the wrong conductor.
A connector designed for another type of LED tape may be too wide, too narrow or internally misaligned. Even if it closes, partial pad contact can create resistance. The result may be flicker, voltage loss, local heating or a joint that works on the workbench but fails after installation.
Connector selection should therefore be treated as part of the electrical design—not as a last-minute accessory purchase.
Seven Compatibility Checks Before Ordering
1. Match the PCB width
Measure the actual width of the LED strip, not the silicone coating, reel or profile. Common COB PCB widths include 4 mm, 8 mm, 10 mm and 12 mm, and Yiholight offers products across several of these formats. An 8 mm connector should not be assumed to fit a 10 mm strip.
The illustrated 2-pin example is used with an 8 mm, single-colour COB strip. For another width, request a matching connector and sample-test the assembly.
2. Match the number of conductors
Pin count follows the strip’s electrical functions:
Single-colour white: 2 conductors: positive and negative.
Tunable white: Usually 3 conductors, depending on circuit design.
RGB: Usually 4 conductors.
RGBW: Usually 5 conductors.
Addressable COB: Depends on power, data and clock architecture.
This table is a starting point, not a substitute for the wiring diagram. Two products with the same pin count can still have different channel order or pad spacing.
3. Check pad layout and polarity
On a single-colour strip, align positive with positive and negative with negative. A transparent housing lets the installer see whether each metal contact sits over the correct pad. For multi-channel tape, also verify every channel and data contact in the specified order.
Never rely only on wire colour. Confirm the markings printed on the PCB and the system wiring diagram.
4. Match the operating voltage
A mechanical connector does not convert voltage. A 12 V strip needs a suitable 12 V constant-voltage supply; a 24 V strip needs 24 V. The strip, controller and supply must form one correctly specified system.
5. Verify current capacity
Connector current depends on contact area, wire size and construction. Calculate the connected load, include a design margin and compare it with the manufacturer’s rating. For demanding installations, use multiple feed points instead of forcing the full load through one small connection.
6. Check the waterproof construction
Treat the clear connectors shown here as indoor components unless the complete assembly has a declared IP rating. An unsealed clip can compromise an IP65, IP67 or IP68 strip at the joint. For damp or outdoor locations, use a connection and sealing method tested for the required environment.
7. Confirm profile clearance
Solderless connectors are wider and taller than bare PCB. Check that the closed connector fits inside the aluminium profile and diffuser without pinching the cable.
How to Connect a COB LED Strip Without Soldering
Always disconnect mains and low-voltage power before handling the strip. Installation details vary by connector design, so follow the supplied instructions. The following sequence applies to the transparent press-contact style shown in the photographs.
Step 1: Plan and test the circuit
Confirm voltage, wattage, driver capacity and feed locations. Test the strip before cutting, and assess voltage drop on long runs.
Step 2: Cut only at the marked cutting line
Use clean, sharp scissors and make a square cut through the centre of the printed cut mark. An angled or ragged cut can leave one copper pad too short for full contact. Do not cut through an arbitrary section simply because COB light appears continuous.
Step 3: Expose clean contact pads
For a bare IP20 strip, the pads should be accessible. With a coated strip, use only a connector and preparation method approved for that coating; do not damage the PCB while removing encapsulation.
Step 4: Align polarity and insert the strip fully
Position the strip so each connector contact is centred on its matching copper pad. Push the strip straight into the connector until it reaches the intended stop. If joining two strips, verify that both ends are cut square and that positive and negative run continuously across the joint.
Step 5: Press the contacts evenly
Close or crimp the connector according to its design. Apply even pressure so both contacts engage at the same depth, without twisting the housing or crushing the PCB.
Step 6: Perform a pull check and power test
Give each strip or wire a gentle pull, recheck polarity, then energize the circuit. Look for full illumination, flicker, dark sections and abnormal temperature rise.
Step 7: Install without loading the joint
The connector is not structural support. Secure the strip and cable so movement or a hanging lead cannot pull on the joint. Keep it away from tight bends and profile edges.
Common Problems and How to Fix Them
The strip does not light.
Disconnect power. Check voltage, polarity and whether the strip worked before cutting. Inspect the transparent housing: contacts must sit on copper pads, not the PCB edge or phosphor. Reseat the strip if the connector is designed to be reopened.
The strip flickers when touched.
Movement-sensitive flicker suggests incomplete contact, a damaged pad, the wrong connector size or strain on the joint. Replace a deformed connector, add cable restraint and keep the connection away from bends.
The connection becomes warm.
Stop using the circuit. Possible causes include excessive current, contamination, incomplete closure or a damaged conductor. A warm connector is not normal simply because the LEDs remain on.
One section is dimmer.
Check connector resistance and the full cable and strip length. Undersized wire, a long run or one-end feeding can cause voltage drop. Measure voltage under load at the input, joint and far end.
The connector will not fit in the profile
Do not force the diffuser closed. Move the connection outside the profile, choose a profile with a larger internal cavity, or use a lower-profile approved connection method. This clearance check is best completed during sampling, not after all profiles have been cut.
Solderless Connector or Soldered Joint?
Solderless connectors are useful when speed, repeatability and serviceability matter. They simplify furniture lighting, retail displays and projects where sections may need replacement.
Soldering may be preferable where space is extremely limited, the joint carries higher current, vibration is expected or demanding sealing is required. It still needs good workmanship, insulation and strain relief.
Choose the method that meets the project’s electrical load, mechanical stability, environmental protection, clearance and serviceability needs.
Frequently Asked Questions
Can every COB LED strip use a solderless connector?
No. PCB width, pad location, pin count and coating must match. Narrow, side-emitting, waterproof or high-power strips may need a dedicated connector or soldered termination.
Can I cut a COB LED strip anywhere?
Standard strips should be cut only at printed cut marks. A free-cut product may differ, but its approved connection method must still be confirmed.
Are COB solderless connectors reusable?
Some can be reopened, but repeated crimping may reduce reliability. Replace any housing or contact that no longer closes firmly.
Are transparent connectors waterproof?
Transparency does not indicate an IP rating. Treat an unspecified connector as an indoor joint and use an approved system where moisture protection is required.
How can I obtain the right connector with my COB strip order?
Provide the project information in the procurement checklist and request a matched sample assembly. If you are unsure about PCB width, pin layout, profile clearance or wire length, contact us with your drawing or installation photo for a compatibility review.
Conclusion
A COB LED strip solderless connector can make installation faster and cleaner, but reliability starts with precise matching. PCB width, conductor count, pad alignment, voltage, current, environment and profile space all matter. Cut at the correct mark, seat the strip fully, apply even pressure, test before final installation and keep mechanical load away from the joint.
For OEM products, repeat orders or project installations, approve the connector and strip as a complete system. That small step prevents many of the flicker, heating and fit problems that otherwise appear only after the lighting has been installed.
Learn more:
How to Customize LED Strip Lighting: A Complete OEM & ODM Guide
How to Choose the Right LED Strip Light for Your Project
This shelf lighting is magic: transform your space with LED strip lights
As a bespoke lighting solution provider, Yiholight specializes in high-quality LED strips and neon flex. Our products are engineered for durability, brightness, and ease of installation—trusted by B2B customers across the globe.
Contact us today to explore the best LED lighting for your business!
© [Yiholight] and [www.yiholight.com]. Unauthorized use or duplication of this material is strictly prohibited without express written permission from the site’s author or owner. Excerpts and links may be used, provided full, clear credit is given to [Yiholight] and [www.yiholight.com], with appropriate, specific direction to the original content.